
Scenario: The Sooner the Better [J91]
Participants: Joe "YJ" C, Myself
Time: Saturday, Mar 12th ~ 1.00PM - 6.00PM

I have always liked desert scenarios. I've played nearly all of them (those being released prior to the last ten years or so) at least once, some several times. Thus it only took a bit of a rules refresh to bring me up to speed. Prior to the scenario I took YJ through the main differences in desert scenarios (rout exceptions primarily) as well as the two terrain types (hamada and scrub) and their effects in this scenario. Also, as the scenario takes place in April '41 the Germans are treated as having red MP's.
 |
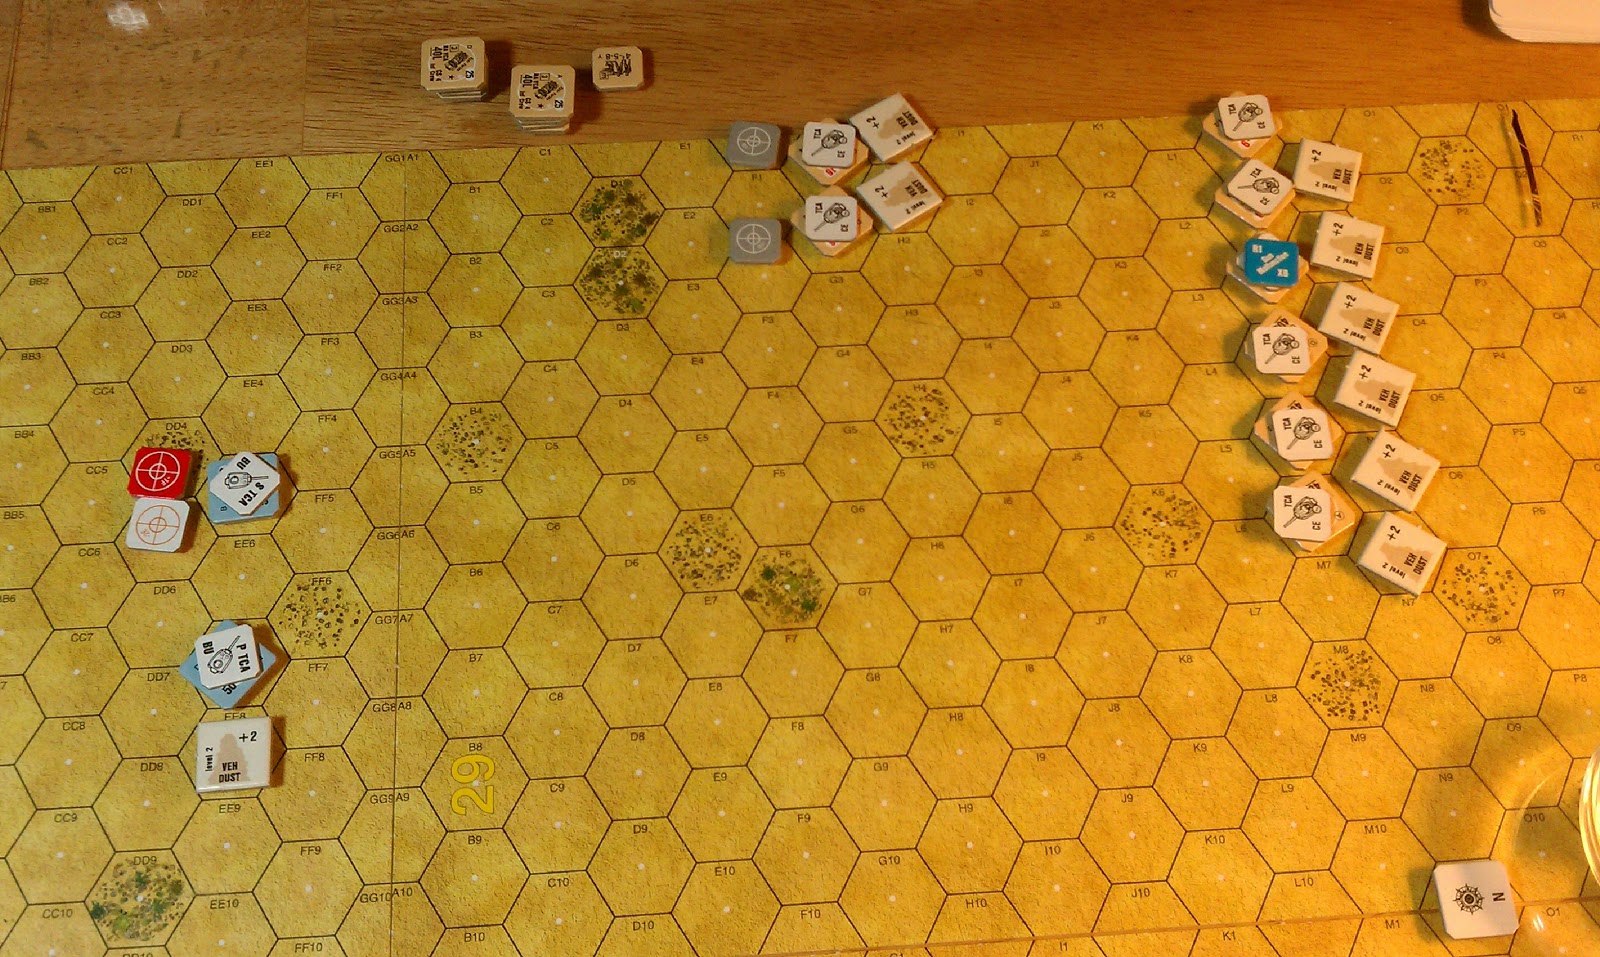
| After set up |
 |
| Prior to the start of Turn 1 |
We rolled for sides and I got the Germans. I had no idea what to expect. I had spent all of my pre-game sauce focusing on re-reading the desert rules, making sure I knew how the Portee's worked again and setting everything up. Thus when I sat down to roll the first WCDR was the first real chance I had to focus on the VC's, this is usually a sure sign that I am in trouble. When I did start thinking about the VC's the first thing that jumped out at me was that I was not going to kill any Matilda's; they have 11 frontal armor and 8 on the side/rear. Most of my tanks are sporting 50's (TK# 11) so my odds in a tank on tank fight are nonexistent. Also his lovely Matilda's are slow, with an MA of 9 while my tanks are going 13. I also knew that if I drove off all of my armor without loosing any, there weren't 40 DVP's worth of German Infantry remaining on the map.
Turn 1: Oh what a sight!
 |
| The German Armor Arrives |
YJ entered the Matilda's and stopped; acquiring six of my tanks in his advance fire phase. One of his MMG's went on a tear and broke my HMG and one of the MMG squads. But more importantly, he was not able to make radio contact at all (my turn or his). I was deathly afraid of that OBA and quite relieved when he didn't make contact.
 |
| End of Turn 1 |
Turn 2: The flight continues...
I decide to break off two tanks to interdict his reinforcement group with the Portee's. This I regret as soon as his turn begins as its getting clearer that should I get all my tanks off (unlikely as that is) I can get a win. With the radio not bringing any OBA down on turn one this now seems like my best plan. As it turns out, the two tanks did draw his attention, but I put them too close and he's able to rush them with his infantry, slipping the Portee's by unharmed. We also realized that YJ forgot to enter his turn one infantry, which we bring on this turn.
 |
| Interdiction |
I decide to park the two Pz IV's and set up the SMOKE shot for turn three, the rest of my armor I keep in motion covered in dust, sans the two unfortunate tanks that I send off to interdict the Portee's. None of my infantry rallies as YJ is keeping them DM with his MMG's in the strong points.
 |
| Wild Aussie's |
On YJ's turn, he again elects to shoot the Matilda's instead of moving them up. He breaks his second MA and takes out one the my tanks near his infantry. My remaining tank has its hands full as YJ charges it with all of his infantry from that group. The Portee's drive past the tanks and head for one of the strong points. The radio comes to life and an ominous SR lands several hundred yards from my formation. The late arriving Infantry force makes a bee-line straight at a couple of my trailing tanks trying to take them out in CC (and failing).
 |
| End of Turn 2 |
I am upbeat at the end of the turn as my armor is at least now in striking range of the strong points and I have not lost any of my main force of tanks aside from the two I foolishly broke off the slow his infantry down. I am starting to think that YJ has made a grave error in stopping the Matilda's as the farther I get from him the harder its getting to get good TH numbers as he is shooting 40L's at 15-20+ hexes and that range will continue to widen on the next turn.
Turn 3: The pipe breaks...
Finally I am able to shot back! My sole remaining Interdicting tank survives CC immobile, occupying two or three of YJ's squads in Melee. The other falls to Matilda fire. I manage to SMOKE the MMG in the pillbox and rush a couple of tanks near this strong point, I send three tanks at the other SP, where the radio is. The Portee's shot at and miss these moves and so I decide to run a tank over there to chew them up. One of my guns breaks as my Infantry try to use it without success.
 |
| Overrun! |
YJ's other group of infantry fail to harm me in CC and these tanks turn and gleefully overrun these units. There are not many occasions in my ASL career where I can recall doing three overrun attacks in one turn, much less two of them with one tank. YJ's stout Aussie's hold up well though with only one of the stacks breaking. But the other three squads in this area are in mortal danger as I am now parked close to him and will be able to machine gun him on his upcoming turn.
However, the back breaker for YJ was his radio breaking in his Defensive fire phase. This radio was really his only remaining AT deterrent on this side of the map at this point. We both now see that keeping the Matilda's stationary for the first two turns was a critical mistake. At the ranges my armor is at now I am nearly impossible to hit given the his small gun size, vehicle dust and finally the light dust. When the radio broke, so did YJ's personal morale. Coincidentally, a pipe in the basement also broke around this time so we were distracted for a while dealing with running water!
 |
| End of German Movement, turn 3 |
I am not entirely sure the scenario was lost when the radio broke, but I knew that if I were in his shoes I would have given thought to throwing in the towel as he did. I was in position to start tearing up the near strong point with close range tank fire, allowing my Infantry to emerge from their holes and start making for the strong point. The two Portee's were also in danger. I would likely get one in advancing fire and most likely take the 2nd one out in the following turn (granted he would have likely taken out a tank or two in his prep). The real issue though was that it was starting to look very difficult at this point for YJ to get near the +40 DVP differential that he needed. I was close to him now and was going to start taking out his infantry, he had nothing on this side of the map to threaten my armor. The Matilda's were at least two turns, but more likely three turns away given their slow speed. By then the scenario would be over.
I can see why this one is even on ROAR. I would happily play either side again. The trick is that the British need to keep the Matilda's moving, forcing the German armor to either flee or stop and help the infantry, exposing themselves to the oncoming Matilda's. I certainly made my share of mistakes as well.
This is really an interesting scenario, like most of the desert scenarios I have played. I hope to take YJ back to some of those old desert classics from the original British module in the coming months, but the arrival today of the latest Journal and Action Pack are going to be big distractions.
Gotta keep those Matilidas moving! They have little to fear from the panzers.
ReplyDeleteTough luck with the OBA.
The new CH Africa Corp mods are getting good reviews (more for fun than balance.I really need to get back into the desert sometime soon. Another good report.
ReplyDeleteI had about 12 shots with the Matildas on his Panzers needing between 5 & 7's in the first two firing phases they were eligible for. Granted, the light dust lowers those odds, but all I had to show for it was a pair of broken MA. The game just wasn't going my way. The radio broke after 2 failed contact attempts and then a red chit draw. So... pretty much everything that could do any damage to the tanks was failing.
ReplyDeleteI'm not sure how keeping the matilda's moving actually helps. There's only about 40 DVP of germans on the board, so if the Germans DO just drive off the board, if the Aussies take a tank or two in that process, they still need to eliminate just about every german infantry unit AND the guns to win (before accounting for any aussie losses).
Perhaps I'm not seeing it (and the OBA in harassing fire may have changed the board enough to change my perspective), but I'd take germans in this, hands down.
As always, I had a fun time playing though. Even if in retrospect I differ from Yockbo on odds.
ReplyDelete